In floor heating Preparation

If anyone has had the pleasure of working in a shop with heated floors, you will never want to build a garage or shop without them.  It is simply the only way to have it!

Heated floors have all sorts of benefits, but in a shop it is especially awesome as it melts all your snow and is a please to stand and work on.  In my case if you also use it as a man cave it makes playing darts easy, and working on a project in the winter is never a probelm.   The only issue I ran into was I had to install a ceiling (bathroom) fan and run it pretty much constantly in the winter as there was a ton of condensation as the heated floors do cause the water to evaporate rapidly.

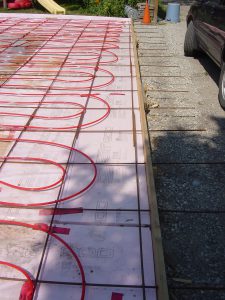
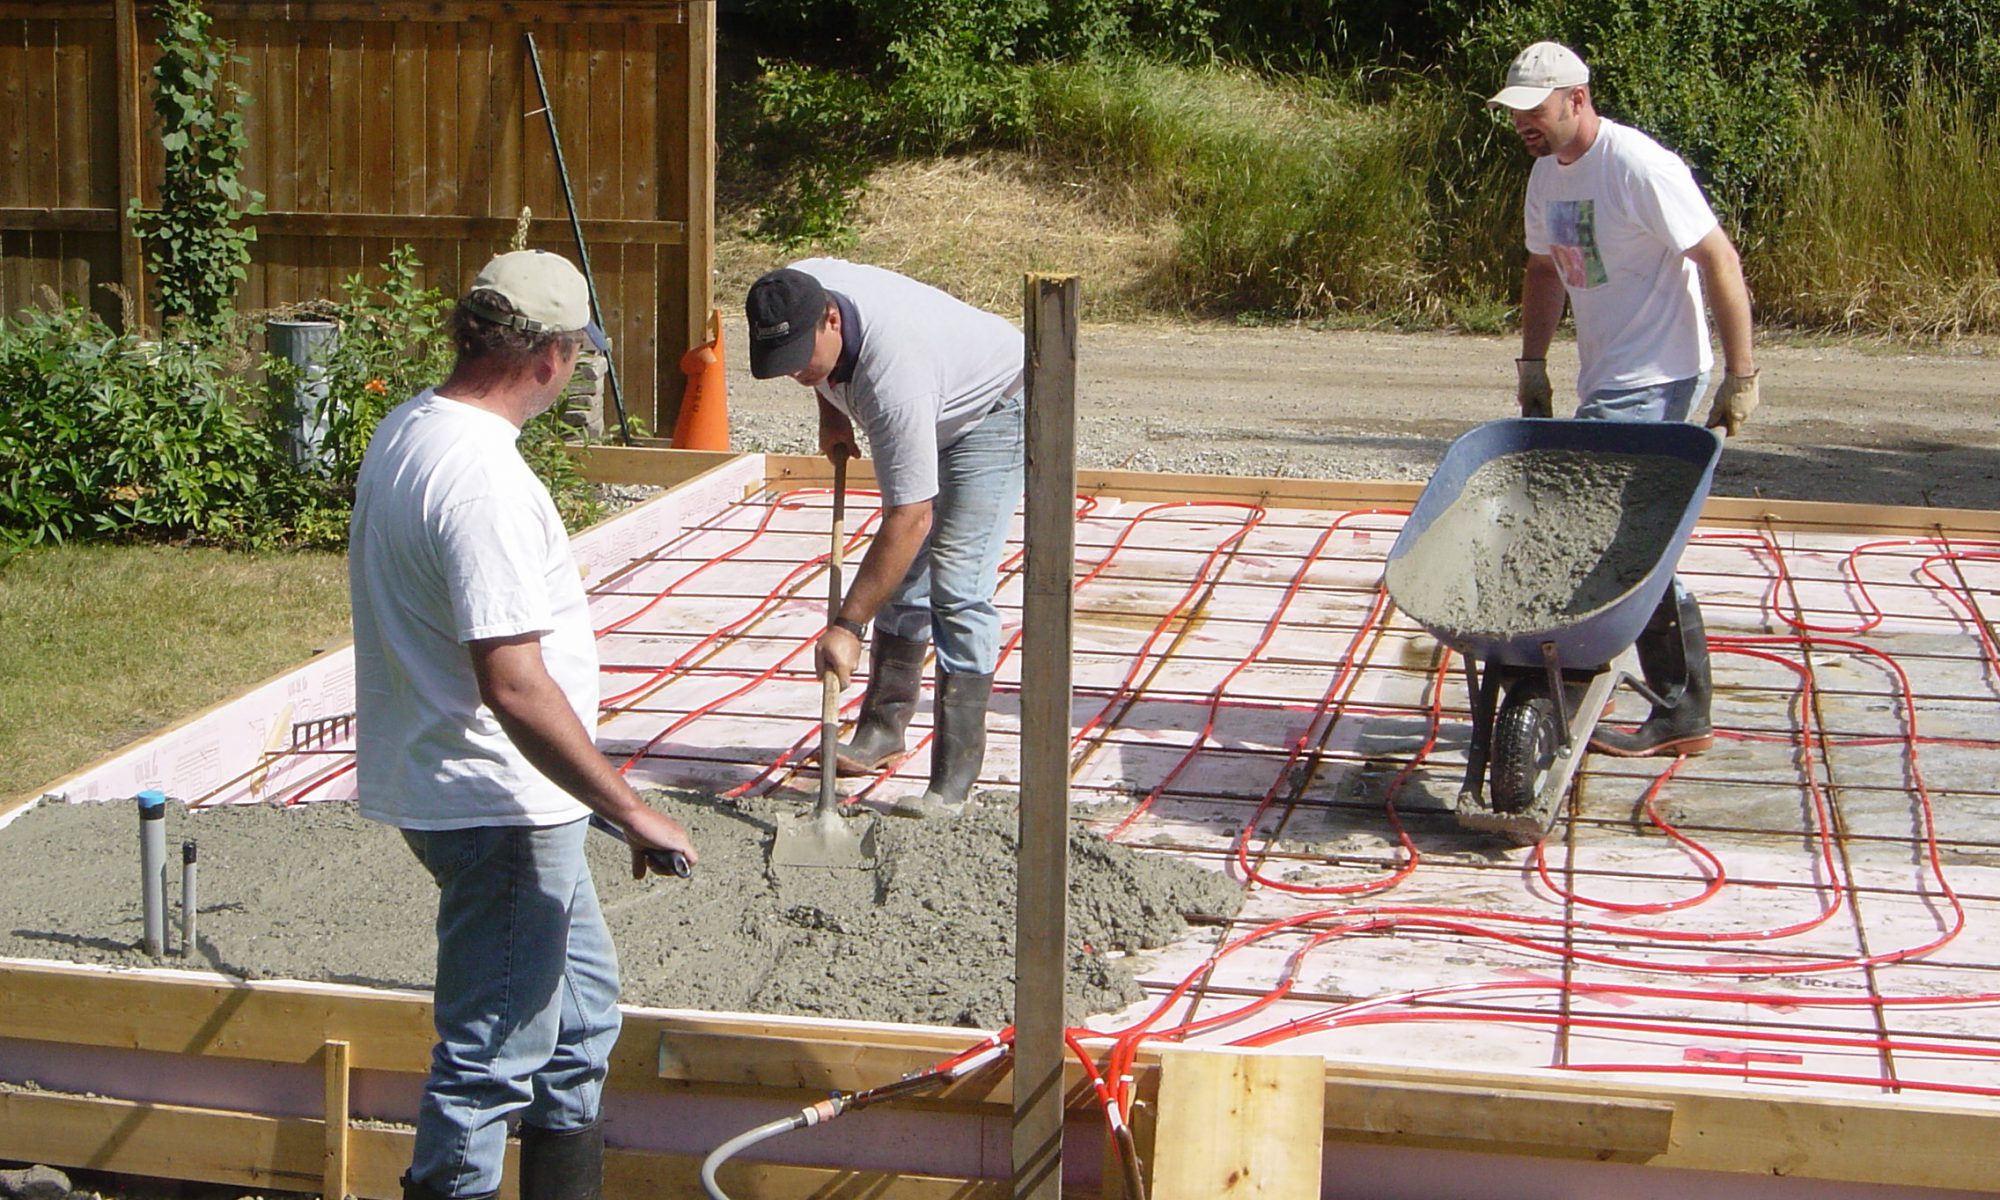
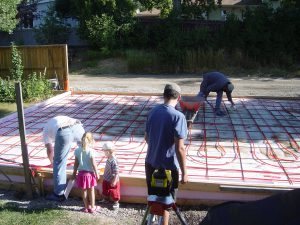
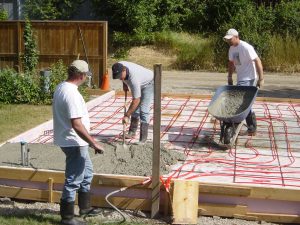
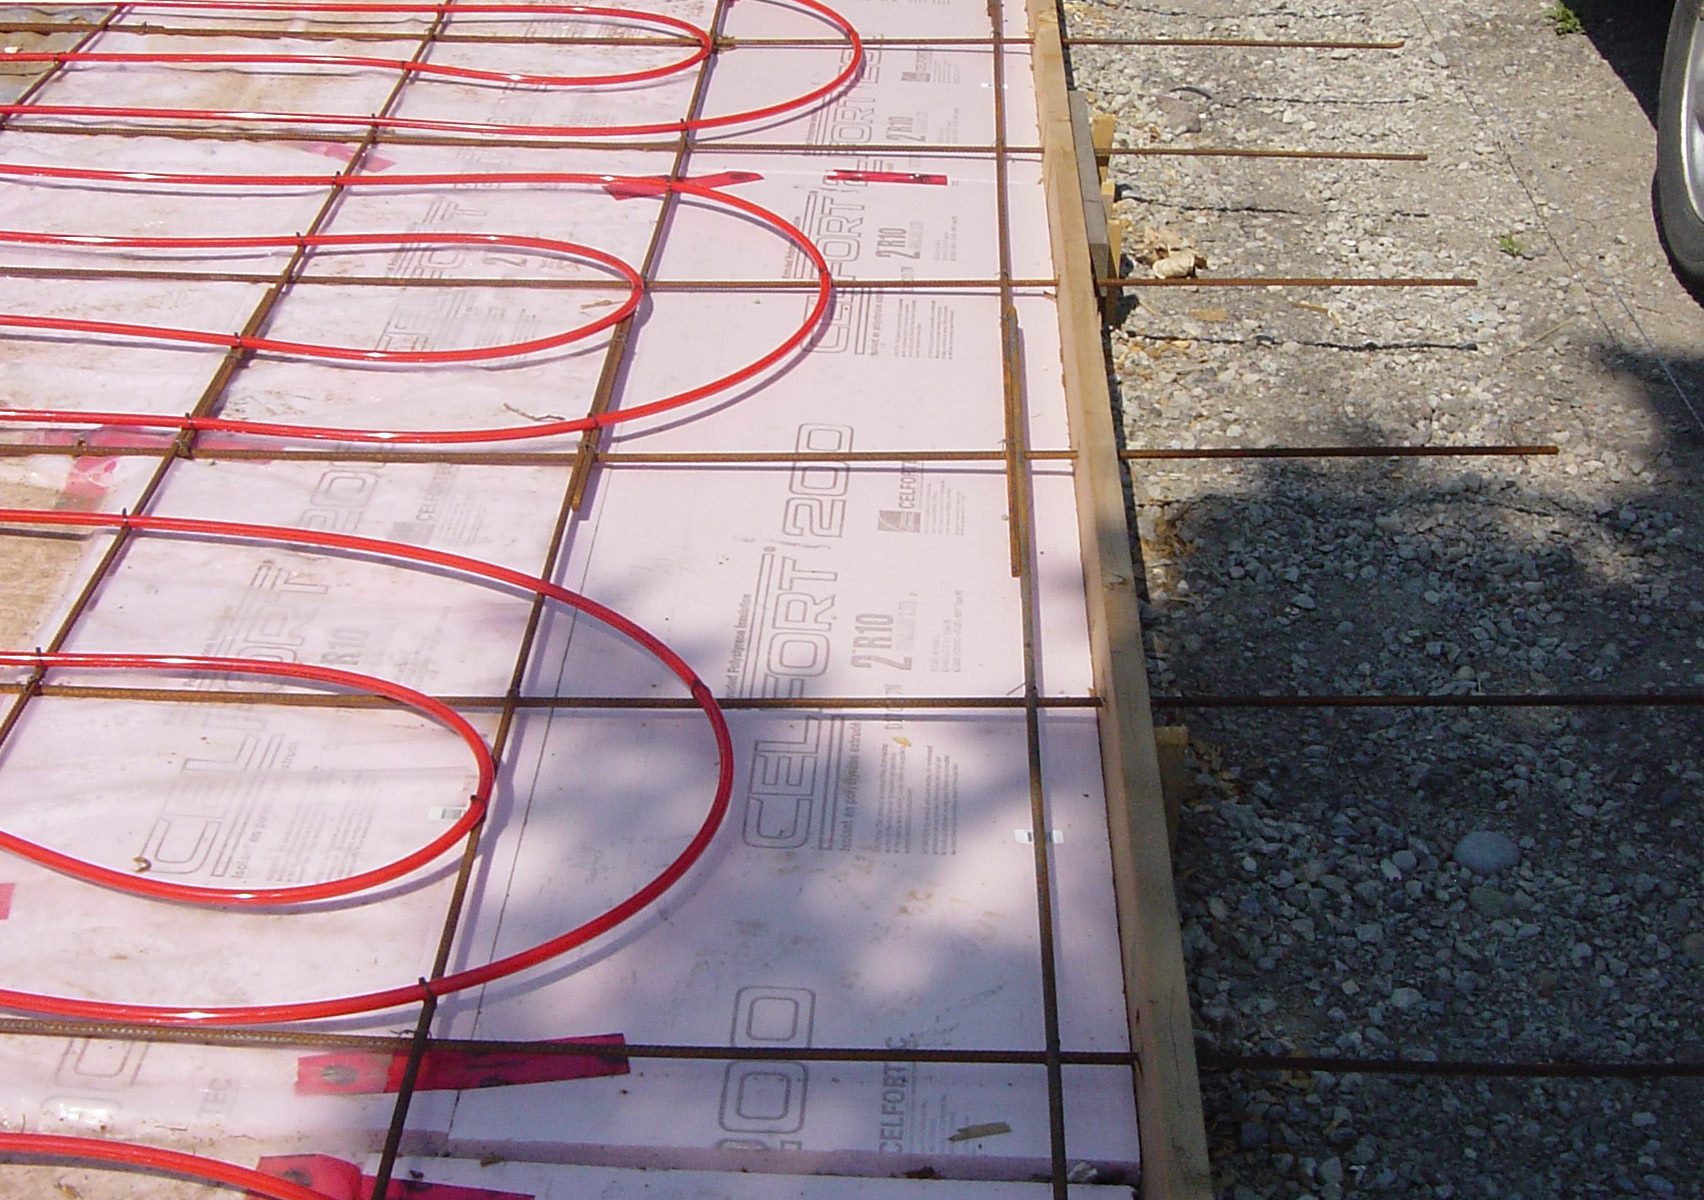
So in Canada it is cold, and in any cold climate you need to insulate the floors from the surrounding environment.  This is especially important for on grade installations.  So we used R20 Dow Styrofoam rated for our load overtop our plastic vapour barrier.  We had to tape it together to hold it.  Note it is on both the wall and floor throughout.  We put a pile of nails into the walls at an angle to help hold it to the concrete when it was poured.

Insulation on side and bottom.

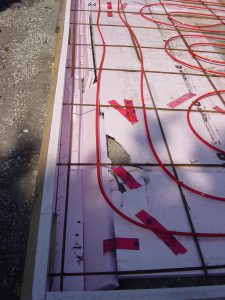
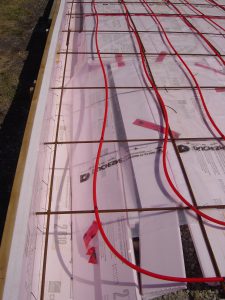
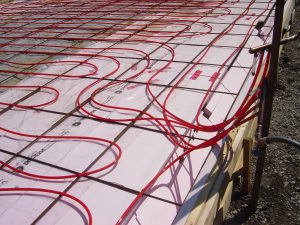
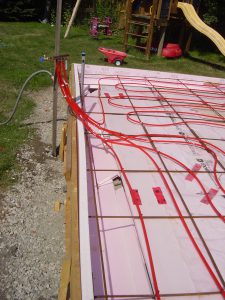
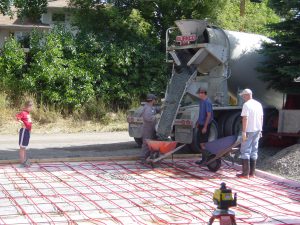
Once we had the vapour barrier and insulation we had to add rebar.  We used a simple square grid about 1′ apart.  You could use the 4″ concrete mesh but we find rebar more durable and really isn’t a ton of work.  Each cross was wired together to hold it.  Then we put 1/2″ floor plastic water pipe from Home Depot on top and tied them to the rebar (on top) using plastic zap straps.  That held everything in place really well.

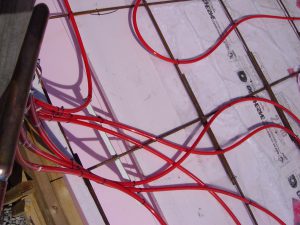
I wasn’t sure that I wanted any joins so we ran all the runs to a single point as shown in the pictures.  One thing to note is we had 2 of the 3 on the double car side, so we could run that zone seperately.  The single car side we ran as a single zone so we could run additional heated water flow there. We did make sure none of the pipes crossed over each other as I had heard that could cause a hole over time.

The layout patter in the pictures really worked well with even heat, so I would do it similarly again.

Apron (alley) end
The Low side
Layout for house side
Keeping lines seperate
Run ends at manifold
Keep the pipes a bit away from outside wall

Cement pouring

Before you can pour cement you will want to pressurize the in floor tubing so it won’t get crushed when people or the wheelbarrows go over it.  I had read different suggestions, but we ended up just presurizing with water.  It was easy to do using our tap water at about 60 PSI.  The other benefit was if you had a puncture anywhere while working it would be quite obvious so  you could fix it right away before the cement sets.  Lots of sites suggest air, but of course you would need to watch the gauge, and you would have to try and find it.

We started in the far corner from the cement truck and worked out way back.  We had a semi truck with 10 meters and a 4″ pad most of the way, although the downslop wall was a bit more.  The cement had fibre added to help strengthen it and keep cracking down.  It wasn’t a lot extra from Burnco and we did end up with a beautiful pad that stood up really well.

Pouring was pretty straight forward.  We had a laser level so my nephew checked the height as we went with our pour.  We made the pad level rather than sloped to the alley to make building the walls easier (not on a slope).  I think if I did it again I would have taken the time to pour the walls seperately and level and made the pad slope out.

It took a fair amount of work for a couple hours, but wasn’t too bad with help!

The leveler
Cement truck
Getting the water out
Pour start with some additional bracing

One area we had a problem with was the downslope wall started to really bow out with about a foot of conrete.  We hadn’t added bracing at an angle which was an oversight.  We certainly should have, but added it before we got too far, although the wall was never perfectly straight.

A real help!
Adding some braces
Big helper adding a brace

Cement Finishing

Like any cement job you need to float the cement to start, then finish it a couple of times. In our case we were a bit late in the final finsh coat and had to add some water in a few spots to get it glass like smooth – which we did!

Finishing with a power trowl
First float
Getting a glass finish

Once we had it smoothed out we sprayed on a sealer to keep the rain out and help protect it.

Concrete sealer